The Ghost in the Shell Universe featured dozens of unique vehicle designs over its more than three decade long history. Although each new iteration, be it Mamoru Oshii's 1995 movie or the later Anime shows, brought its own aesthetic, the core design philosophy stayed mostly the same. One of these core design choices is the heavy reliance on existing cars, bikes and trains. Although Ghost in the Shell takes place many years in the future most of the visible vehicles are those of today helping to ground the universe in reality. Secondly, and more importantly, the vehicles and robots which are new, take great inspiration from the animal world. This is evident in one of the series most recognisable designs, the Tachikoma, which are shaped like spiders. But this design philosophy extends to almost all the new vehicle designs throughout the franchise: the sniper-helicopter at the end of the 1995 movie open their passenger bays like the wings of a bird, the underwater cyborgs in 2004's Innocence are shaped like sharks and the HAW206 tank in Ghost in the Shell: Stand Alone Complex first episode takes the form of a giant scorpion. Out of all the vehicles my personal favourite is the Jigabachi, which appears in multiple episodes in GITS:SAC and 2nd GIG.
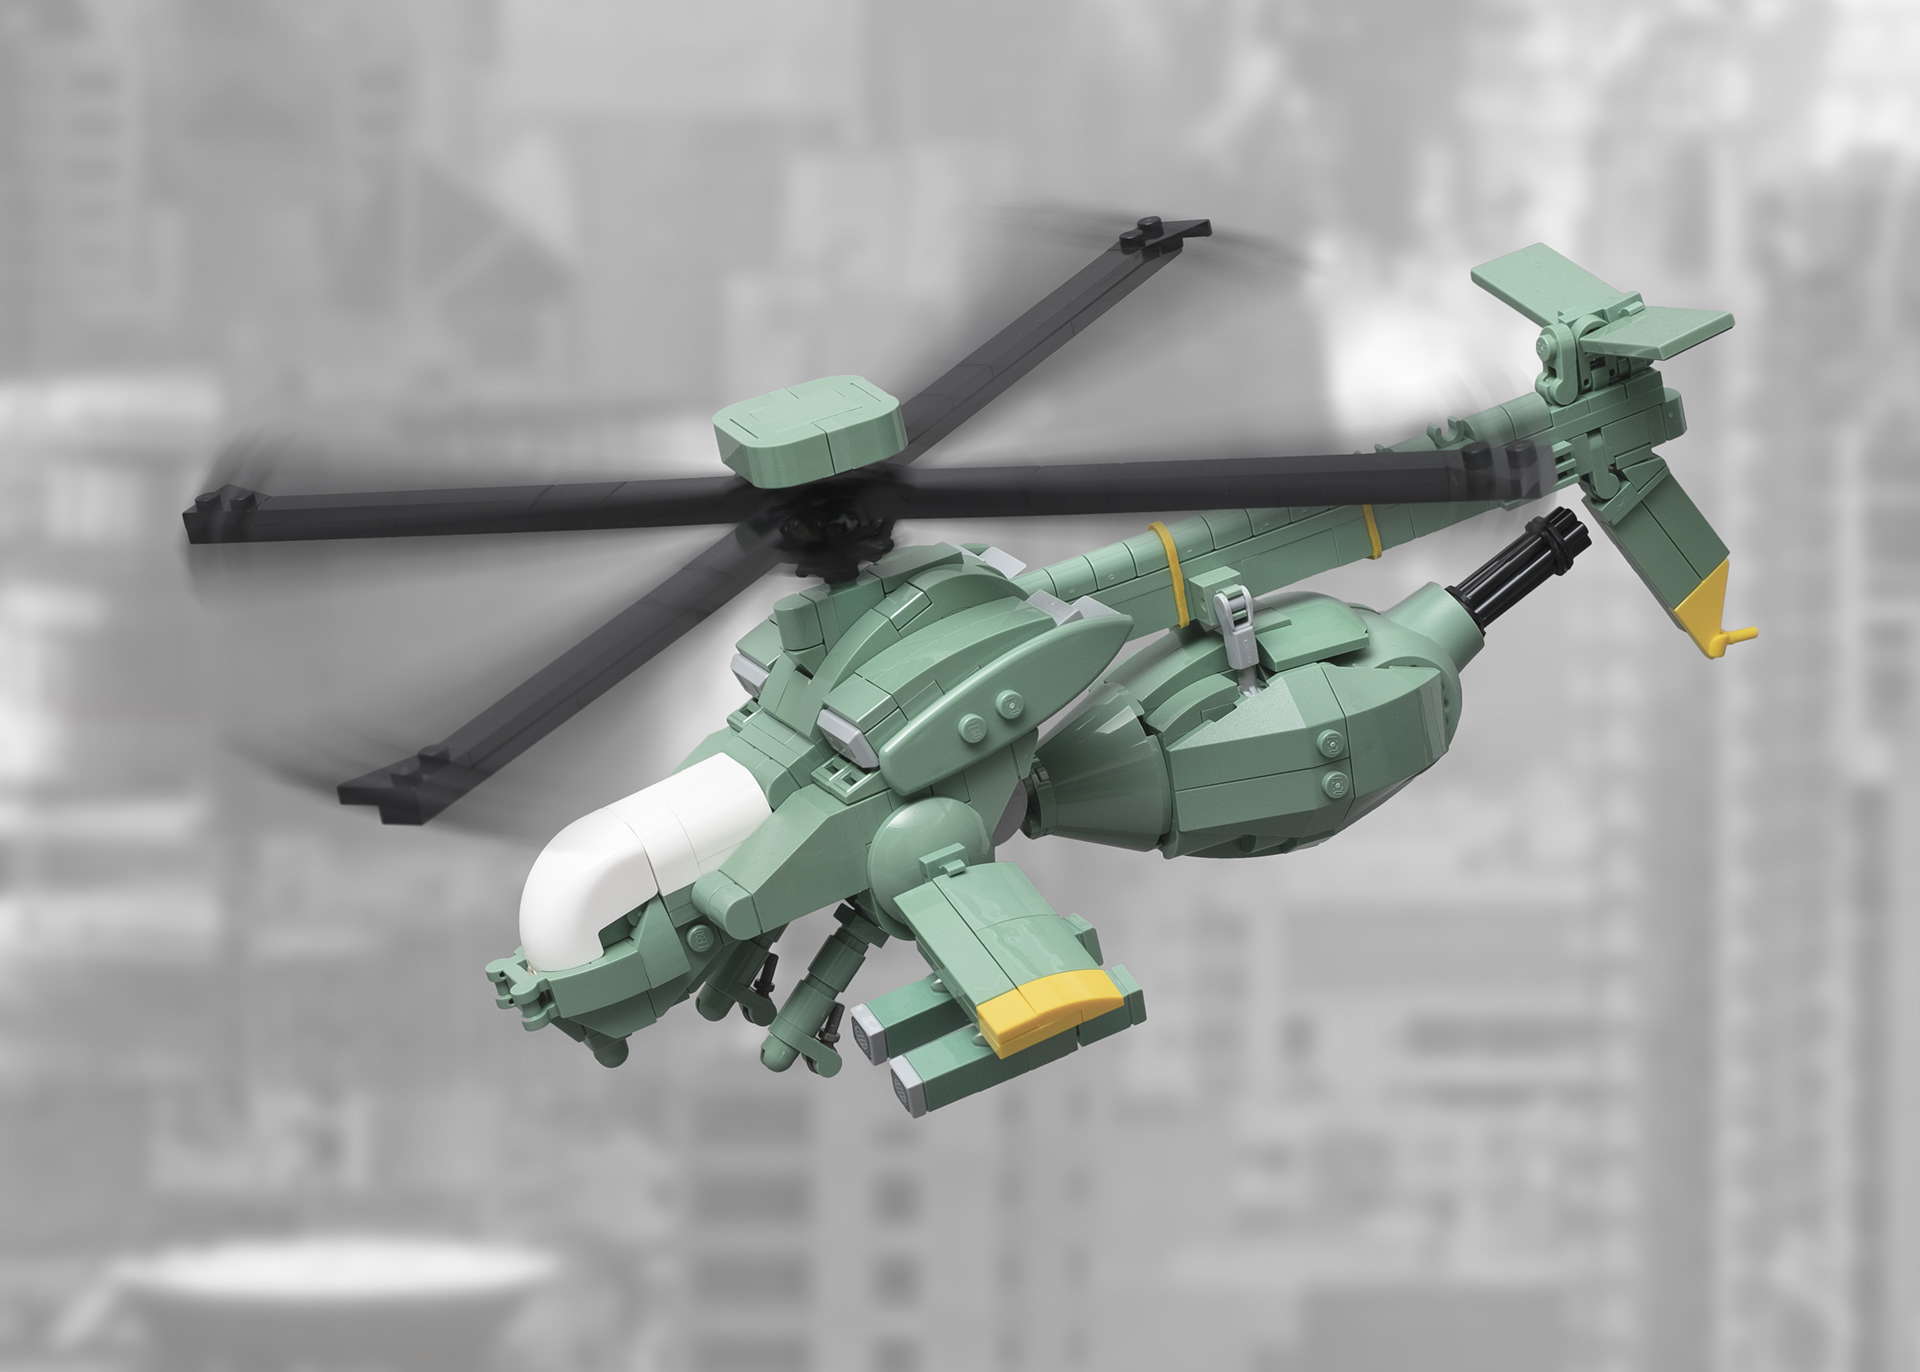
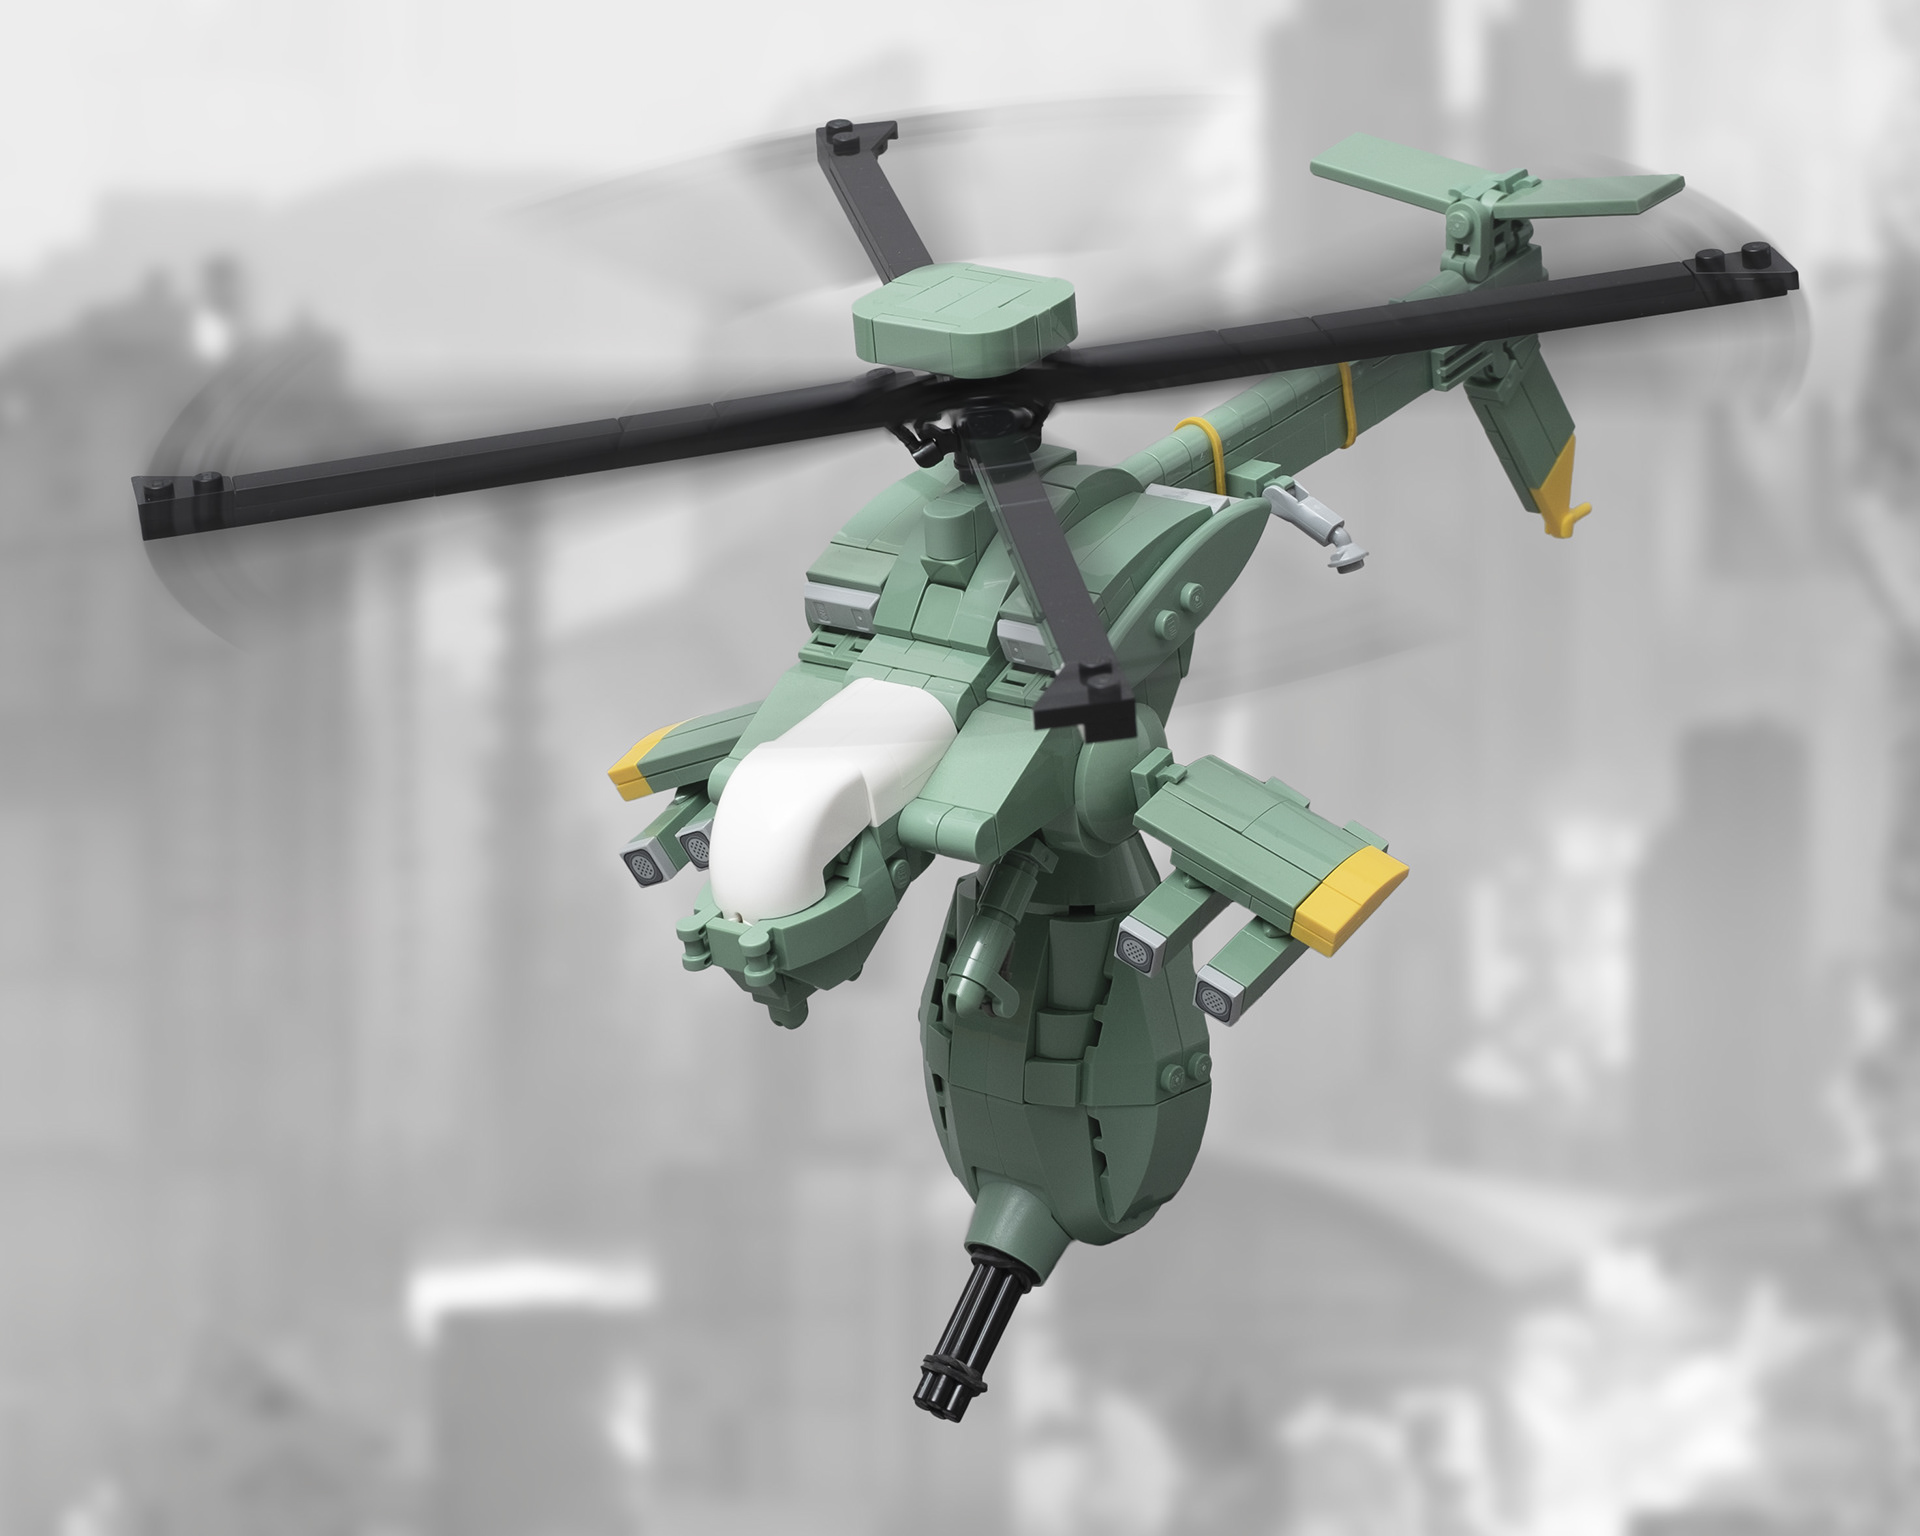
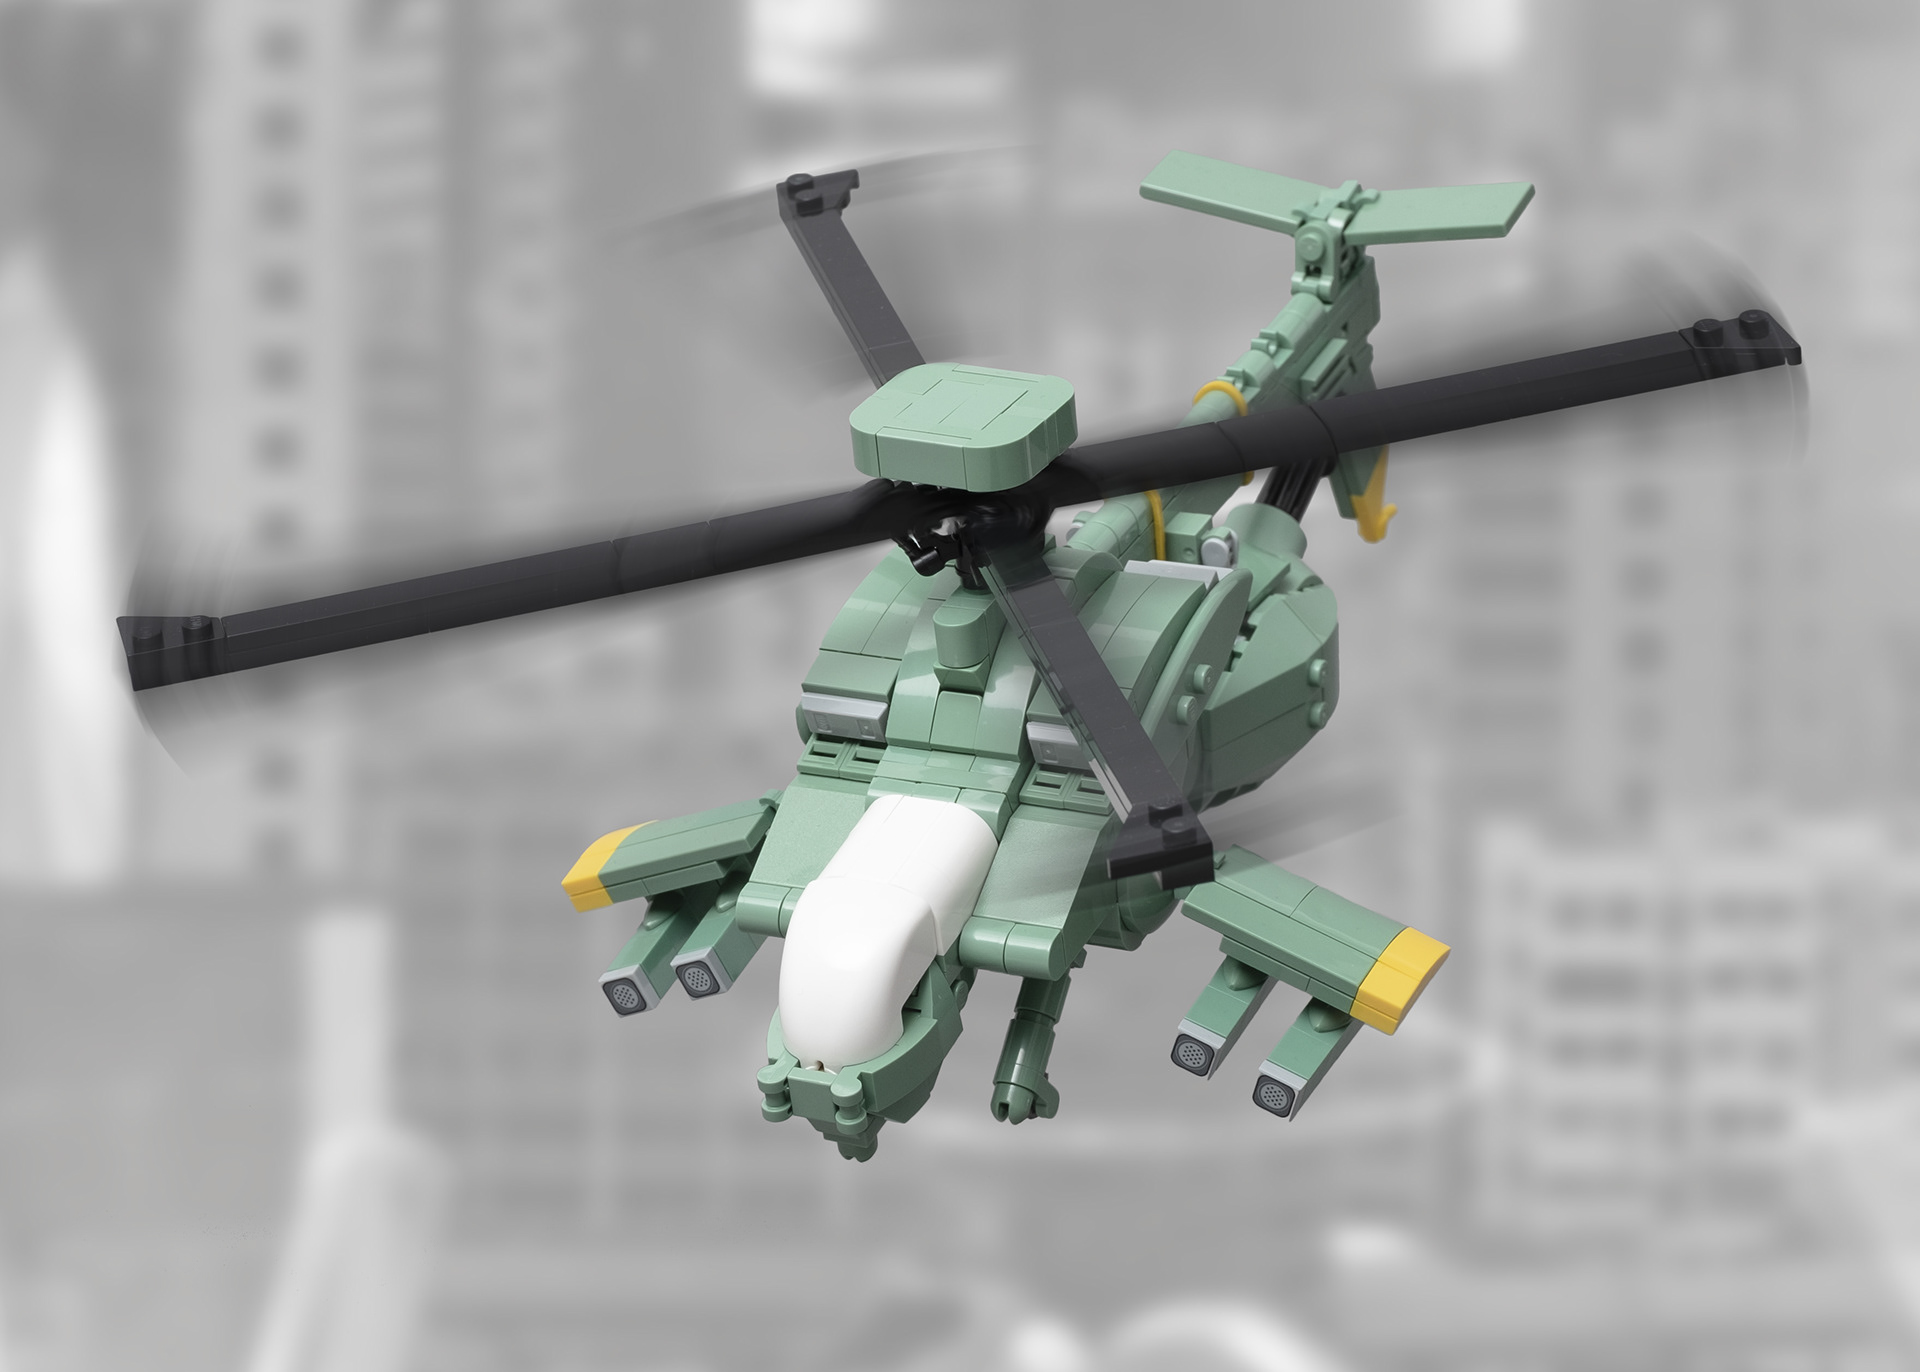
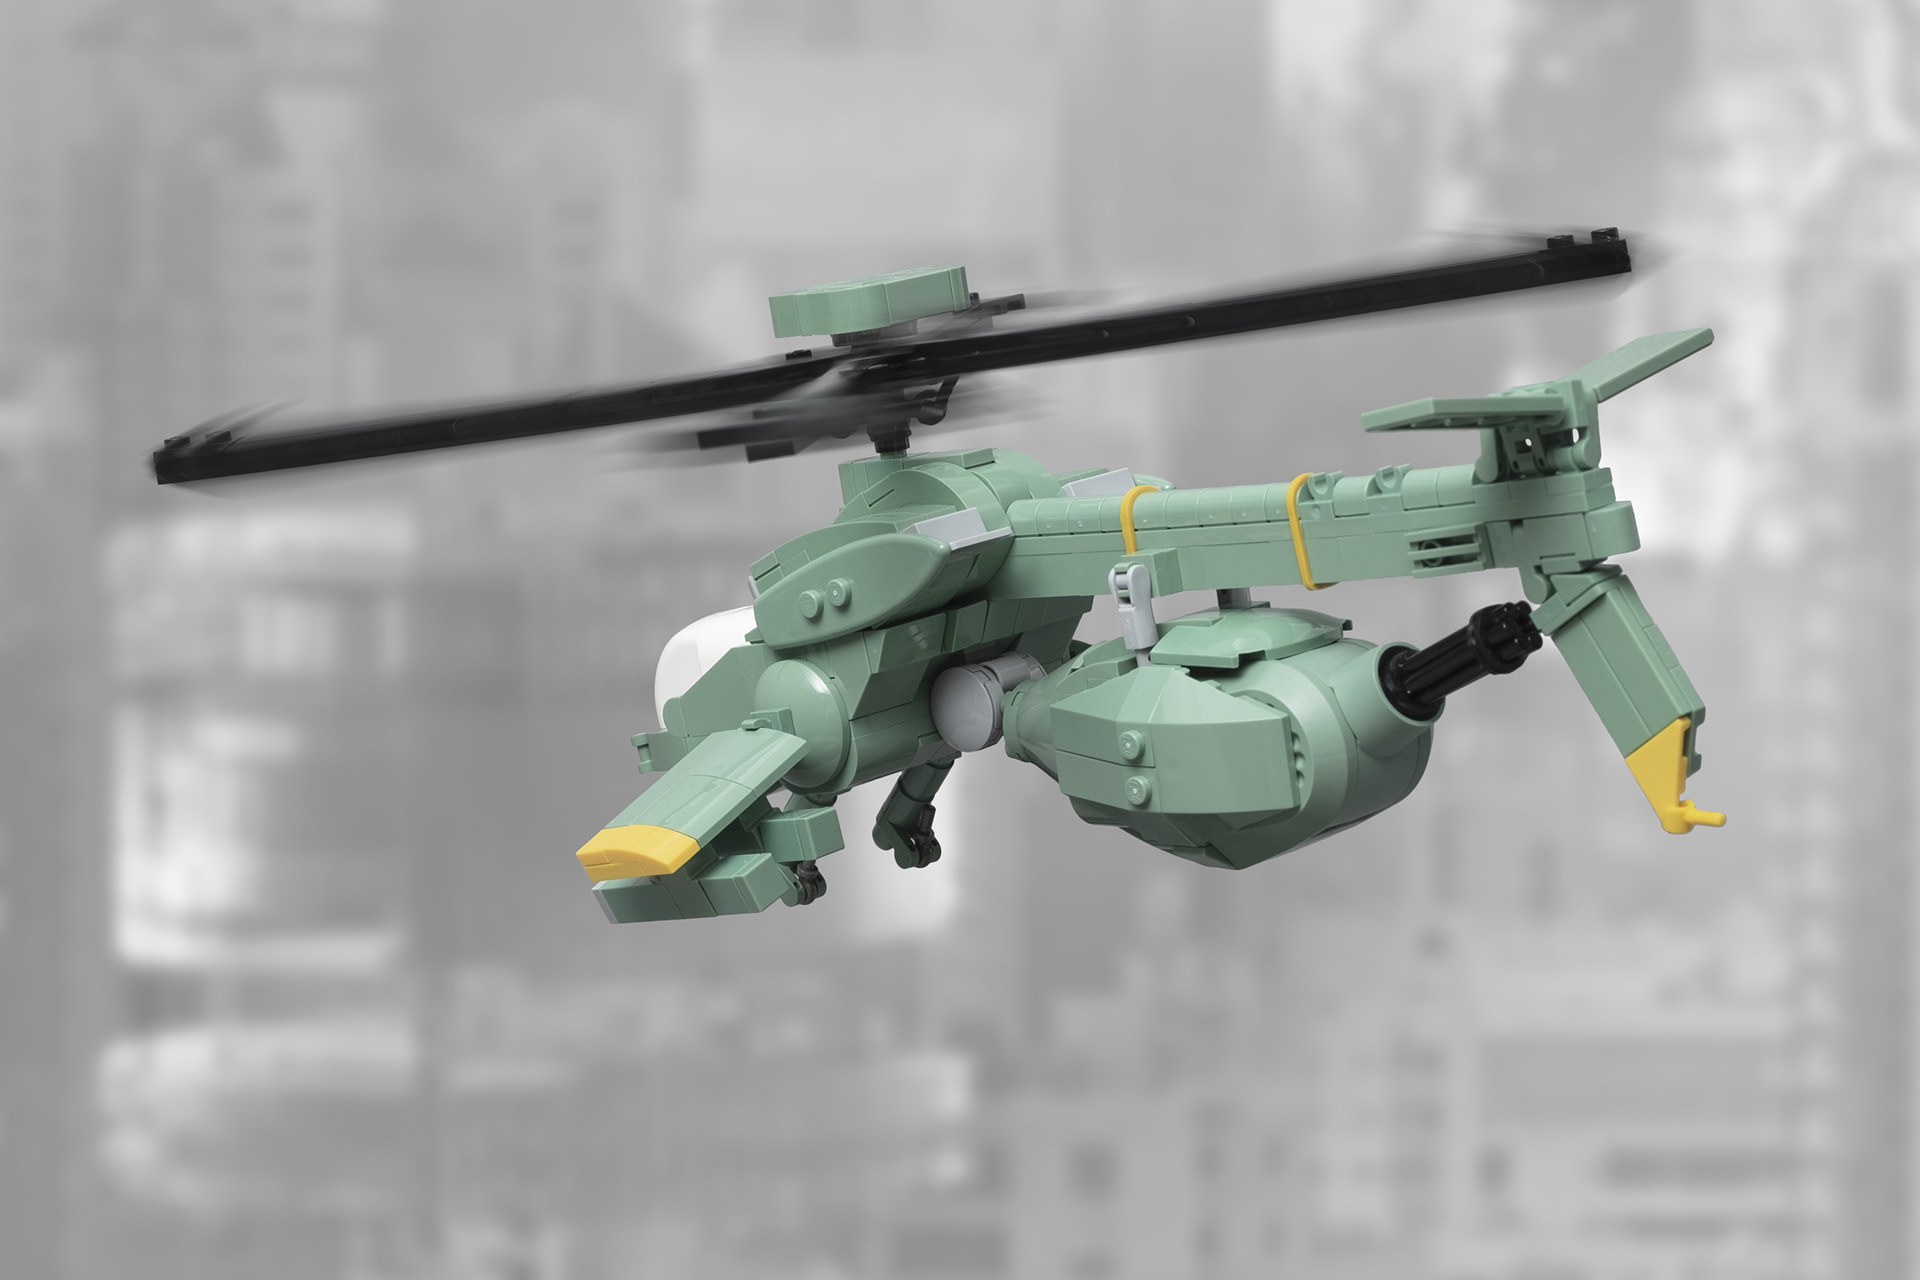
The Jigabachi (ジガバチ, lit. red-banded sand wasp) is an anti-ground attack helicopter utilised by the Japanese Self-Defence Force (SDF). It utilises a NOTAR ("no tail rotor") design-scheme, featuring T-shaped winglets at its tail. The cockpit is heavily armoured and therefore not translucent. The most iconic design feature and the one giving the vehicle its name is the Gatling gun pod attached to its main body. It folds back along the tail for take-off and landing as well as for patrol flights, but swivels down into attack position for combat. The gigantic pod in combination with the skinny frame of the helicopter is very reminiscent of the shape of a wasp, almost to a comical degree. Yet, most of its body is geometric, with clear lines and rectangular forms, and not organic. This symbolism is at the heart of the Ghost in the Shell universe. Everything seems natural until closer inspection when it all turns out to be man-made and artificial. In a world where nature is a distant memory, technology like the Jigabachi not only mimics the shape of the animals but their characteristics as well: The deafening, wasp-like buzzing they create while flying through the city skyline.
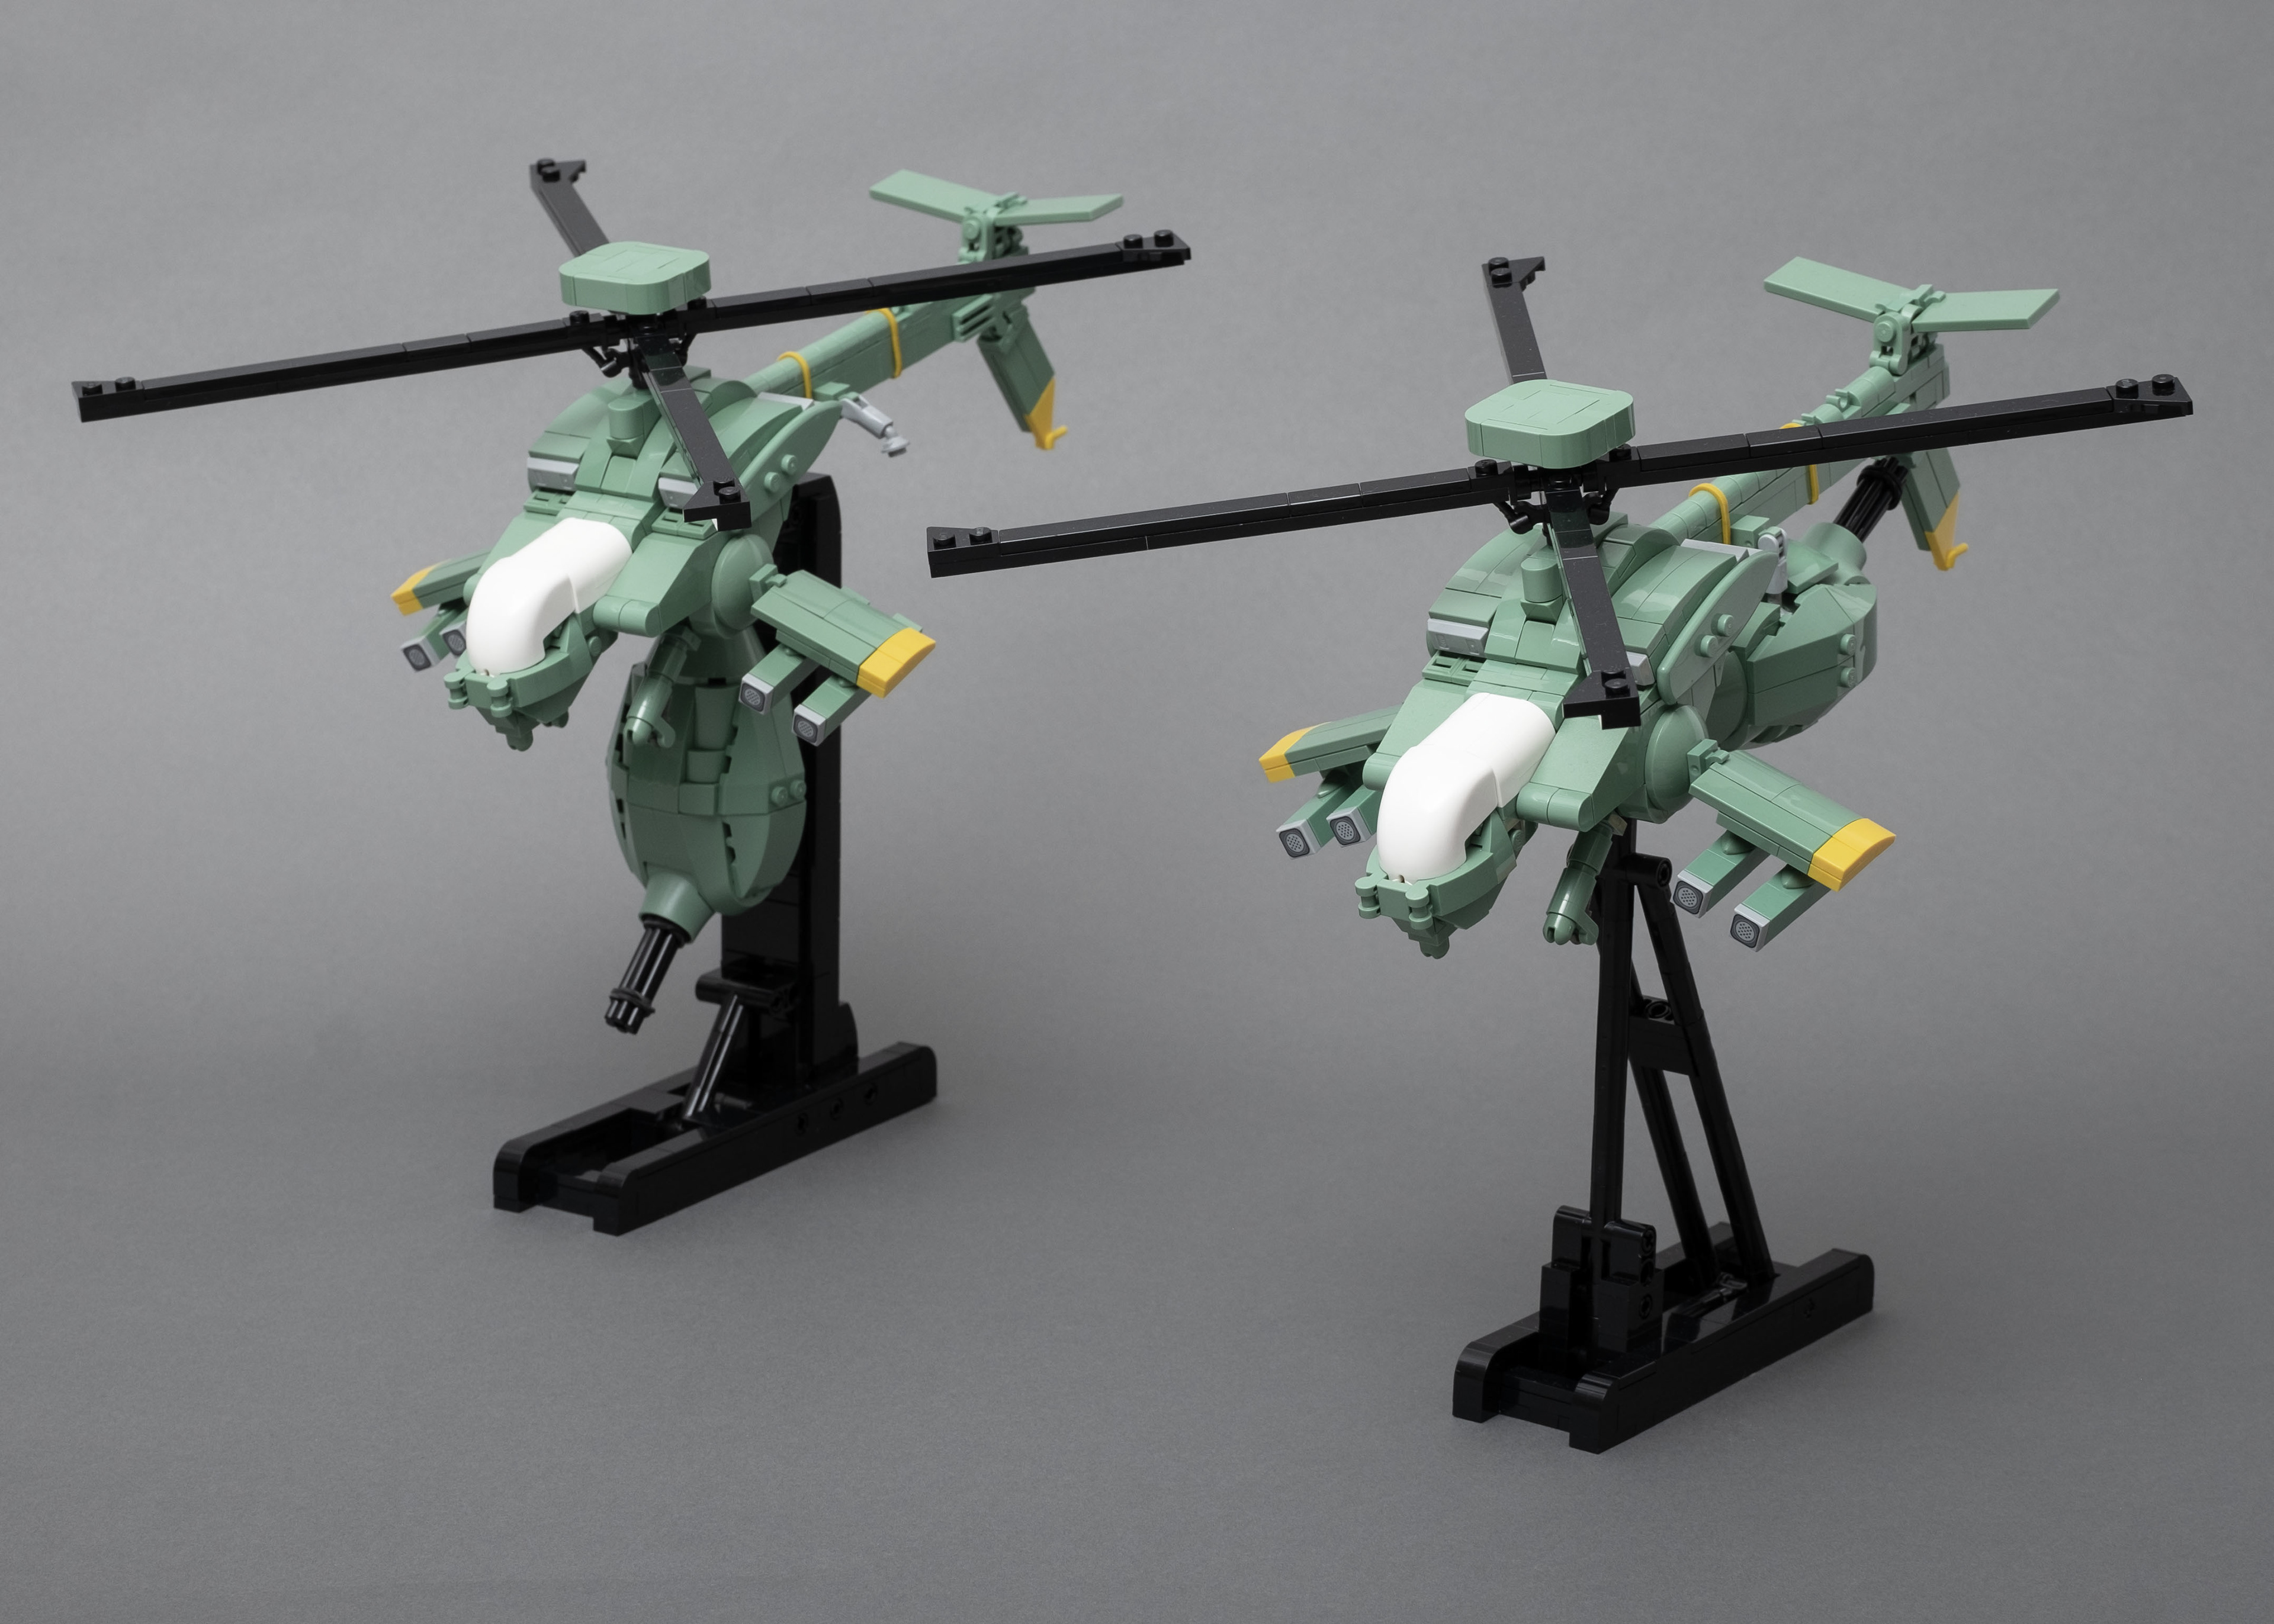
In the first season of GITS:SAC, only the standard version of the Jigabachi appears, while in 2nd GIG a new type, called Jigabachi AV, is introduced in Episode 4 "DU: Natural Enemy – NATURAL ENEMY". This new helicopter features a different cockpit and body design, is more heavily armed and has a grey colour scheme. Because of its prominent role in the episode as well as in the season finale, the Jigabachi AV is probably better known to most fans than the standard Jigabachi. However, when picking which variant to recreate with LEGO® bricks, I chose the standard version, as I think the sand green colour is visually more interesting. It appears in both seasons, but there is one small design difference. In Episode 2 "SA: Runaway Evidence – TESTATION" of Season 1, its cockpit is white, while in its later appearances it is coloured maroon. I decided early on, that I wanted to use a mask piece from LEGO® BIONICLE (Part-ID: 57702) which only comes in the solid colour white (Colour-ID: 1) and I therefore went with the Season 1 version of the Jigabachi.
The LEGO® colour sand green (Colour-ID: 48) offers quite a large variety of pieces which substantially grew over the past years. Still, it was challenging finding the right shapes for the Jigabachi. The final version of the model presented here was made possible thanks to the introduction of the 1*1 double curved slope (Part-ID: 49307) first released in 2019 and available in sand green since 2020. The model uses 21 of these bricks in total, mainly for the tail and the transition between the cockpit and the main body.
When designing the Jigabachi, I started with the pod because it is one of the its most recognisable features. It needed to be very light so that the finished model would not get too back-heavy. Therefore, the bottom half is created with only three pieces (Part-ID 40373, 40374 and 40375) which where introduced as animal body parts in the year 2002. The connection points, where normally the legs would connect to, are covered with wedge pieces (Part-ID 64225) while the connector intended for the tail is used for the Gatling gun. Conveniently, I did not have to use a separate hinge piece for the gun to tilt forward and back as this is already integrated in the pieces. A cone piece (Part-ID 3943b) and several slopes were used to recreate the top half of the pod and give it its characteristic shape.
On the sides of the Jigabachi, surfboards (Part-ID 90397) were used to cover up the slit between the lower section and the angled air intakes. Similarly, 3*3 dish pieces (Part-ID 43898) create the transition between the main body and the side-wings. The Jigabachi also features some yellow (Colour-ID 3) markings which were mostly made with bricks. The two stripes on its tail however, are created by two LEGO® rubber bands (Part-ID 23229).
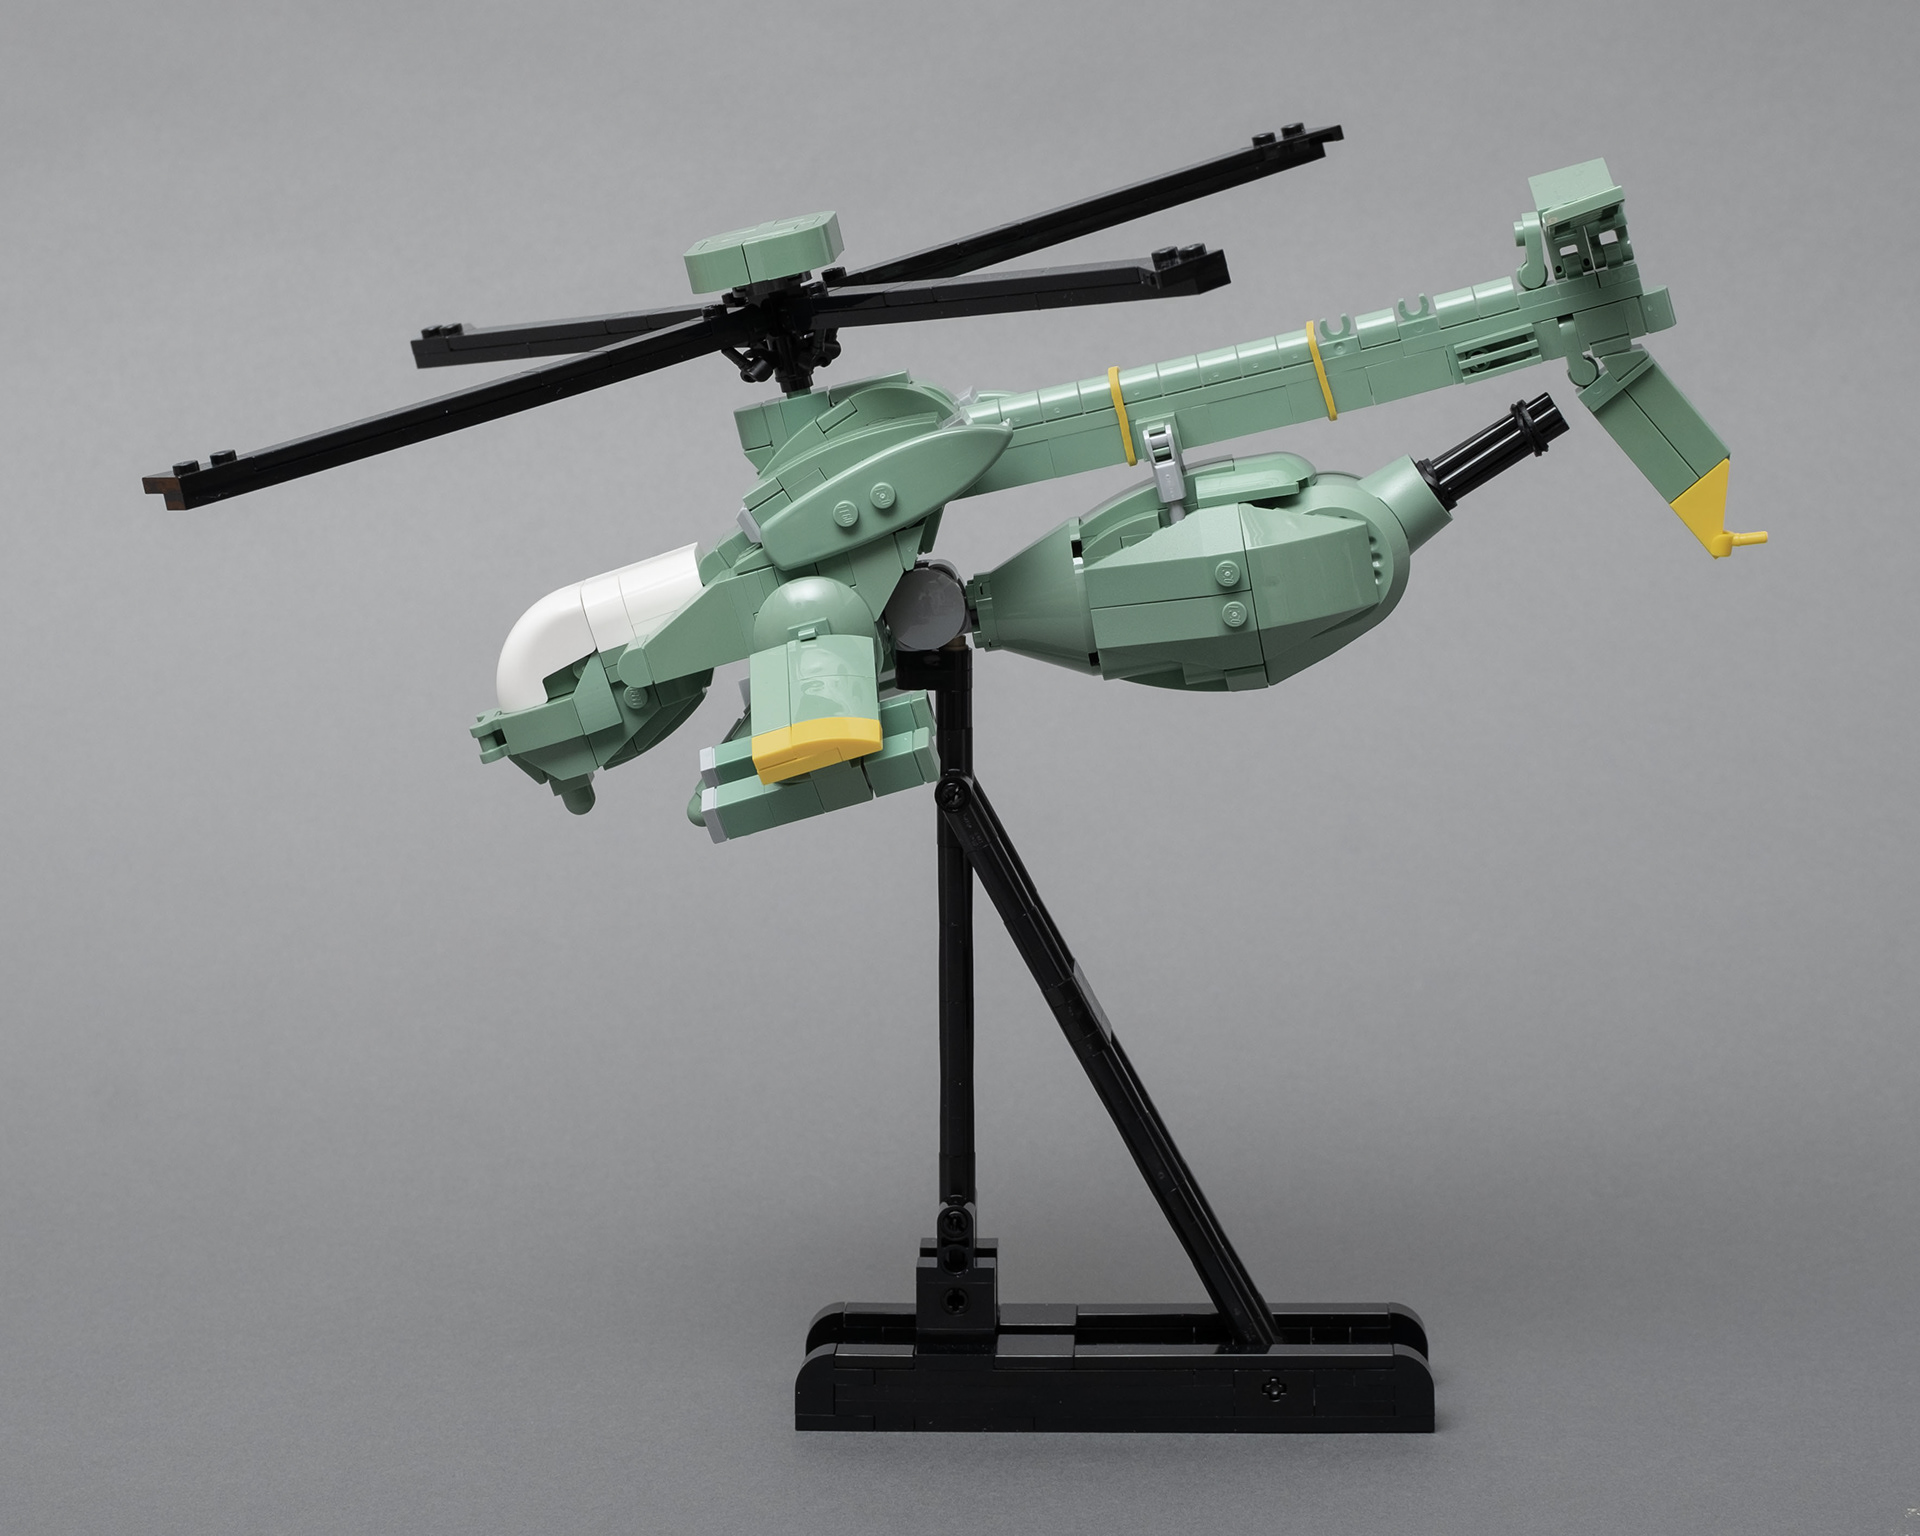
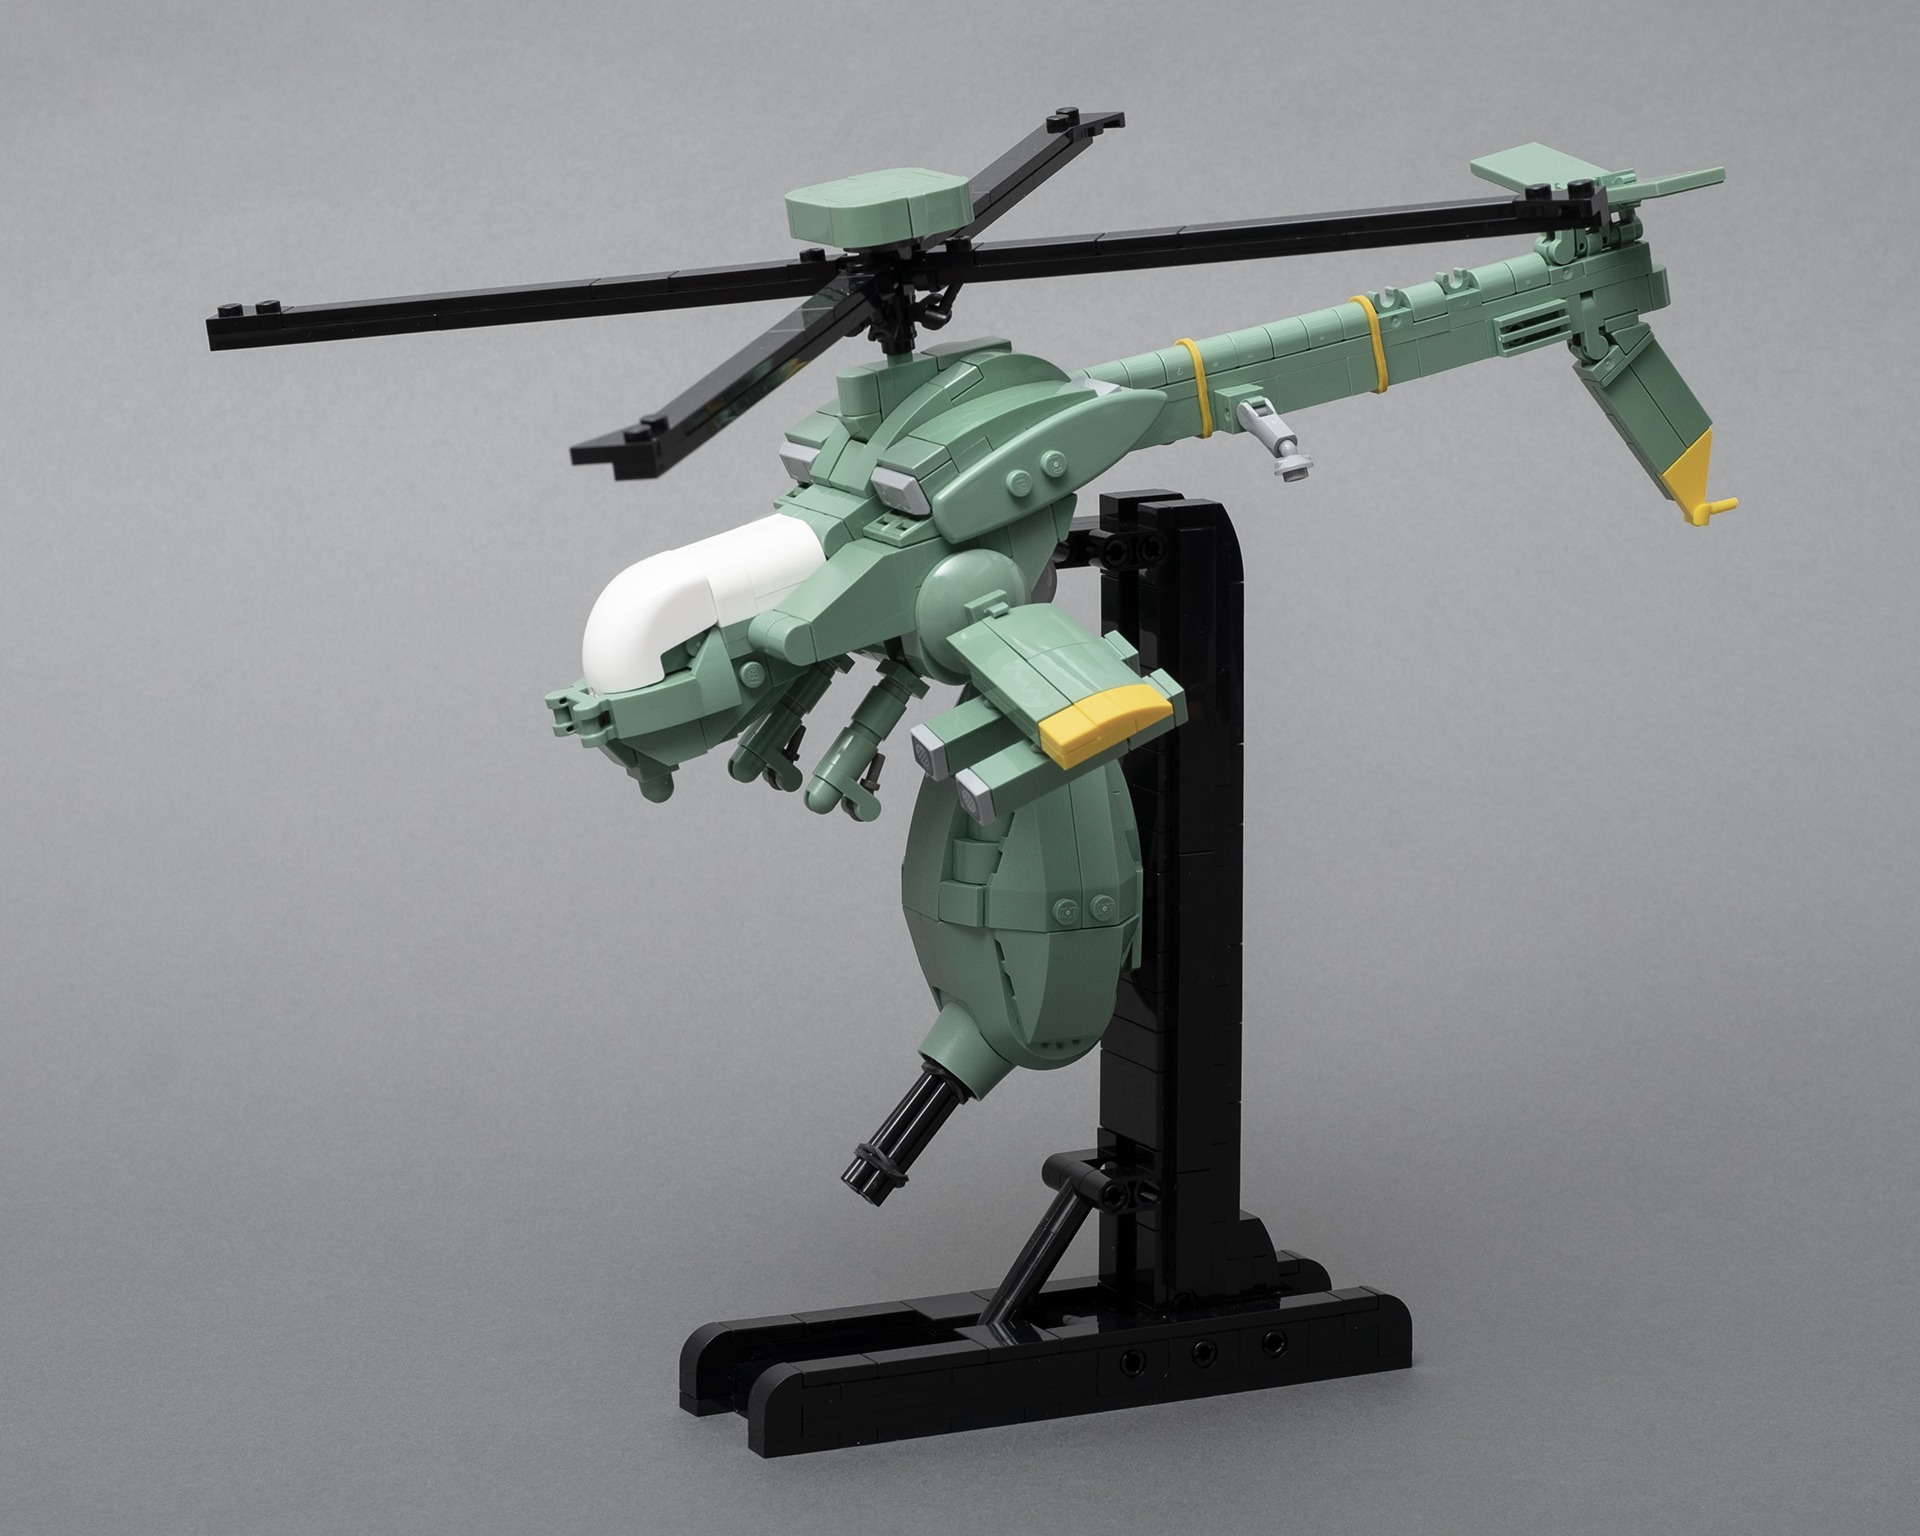
I wanted the Jigabachi to be displayable in both configurations: With the turret folded back as well as it hanging in attack position. Since the center of gravity shifts greatly from one configuration to the other, I had to design two different display stands.
The one for the patrol flight configuration was fairly easy to design. It can be attached straight to the main body from underneath and one stud at the tip of the stand tilts the whole model slightly forward. That way the models weight balances out and the beams of the stand could be quite slim.
Building one for the attack configuration was a lot more challenging. Because the pod hangs straight down, the stand needed to be ] - shaped to go around it and attach from the back. This meant, however, that most of the model's weight would be in front of the attachment point. Therefore, the stand itself needed to be heavy enough to counterbalance that offset. After trying out different variations I chose to make the beam a sturdy, brick-build monolith. This technique greatly reduces the stands potential to bend or tilt over. Meanwhile, the base itself is kept five studs wide and uses the same parts as the other stand, so they, albeit their different designs, look coherent when displayed together.